You can import data from Microsoft Excel (xls, xlsx) and CSV files into the system.
Important!
When importing orders into the system on a free plan, keep in mind that uploaded orders are also subject to a limit of 300 free orders per month. If the limit is exceeded, each new order will be charged separately. Orders created earlier than 7 days before the upload date are not charged. On the "Professional" tariff orders are not charged. Also, when importing an archive we recommend disabling all triggers responsible for sending Email and SMS messages.
Open the corresponding section in the system: Sales → Orders
Note
The “Import of orders” button is available for administrators and for users with corresponding rights.

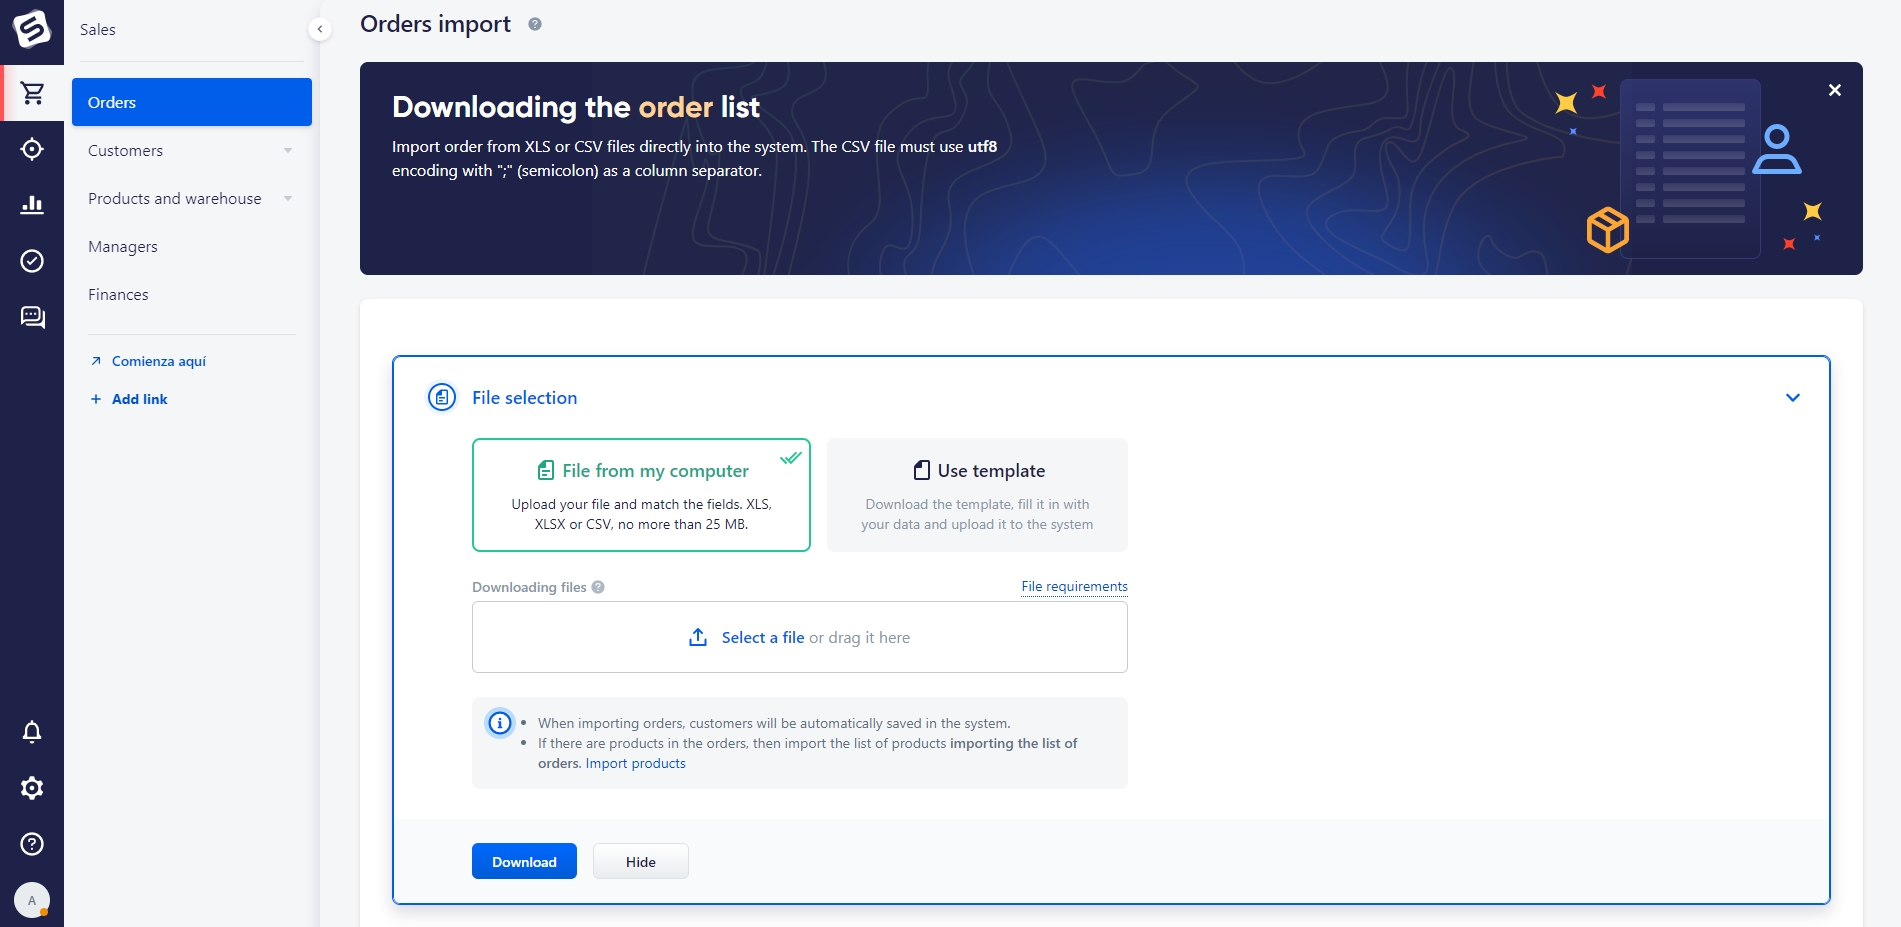
Selecting a file
- Choose how to upload data: using a ready-made file or using a template.
- Upload the completed file/template to the Upload Files block
Note
If the order number is not specified in the file being uploaded, it will be generated automatically during uploading.
Requirements for a ready-made file to be imported:
- To avoid errors, the data in the table should occupy strictly its own columns.
- Use the correct input format for each field type.
- File size should not exceed 25MB
- When uploading data from a file, we rely on already existing directories in the system. Make sure that the fields to be uploaded have the entered values in the system. For example, order statuses, order types, etc.
- To upload user field data to the system, create an additional column. The name of the column will match the name of the user field in the system. If the user field has not yet been created in the system, it will be created during import.
- To add a product to the order, create an additional column, for example, "Product 1", "Product 2", etc. The number of such columns = the number of products in the order. You can specify properties of products in the following order:
- «Name»
- «External code/Article»
- «Selling price»
- «Quantity».
These properties should be specified through the symbol "-" (dash), add a space between the characters.
| Product 1 | Product 2 | Product 3 |
|---|---|---|
| Jeans – 12345678 – 3000 – 1 | Hoody – 12345789 – 4000 – 1 | T-shirt – 123445789 – 1500 – 1 |
- The connection of a product from a file with an already existing catalog in the system is performed first of all via the "External code". If no matches are found, then the system checks the full match of the name of the trade offer, taking into account the letter case and punctuation marks.
It is available to download an example of a ready-made file. To do this, click on the File Requirements button.

Template requirements:
- Please note that you need to download a new template before each upload. Templates are updated regularly to be as accurate and helpful as possible. Do not add or delete sheets and columns. Do not change the order of columns or hide them.
- File size should not exceed 10MB.
How to complete a template
When uploading orders into the system:
- For some columns you can select only values from the drop-down list. The drop-down list contains up-to-date directories from your crm.
Using the example of completing "Order status" in the import file, if the existing values in the drop-down list do not suit you (already existing order statuses in your system), you can create a new order status in the system settings in the «Statuses» section.

After adding a new order status, be sure to download a new template.
- If the order contains more than one product item, specify the subsequent products on a new line. The link between the product and the order is identified by the "External ID" of the order or "Order number" fields. They must coincide.
- Please note that when transferring the payment status, it is also necessary to transfer the type of payment to which the status will refer.
Example of completing a template

Import settings
After uploading the file into the system for import:
- You need to select "Store" for imported orders.
- Activating the "Update duplicates" option means that the imported data will update the information in duplicates. Duplicates are identified by the "External ID" and "Order number" fields.
- Activating the "Link orders to existing customers" option will allow you to link uploaded orders to customers in the system that have already been created before. You can use the email or phone number fields to match the order and the customer.
If you upload using a ready-made file, then proceed to setting up field matching. The field can be left blank and the column will be skipped during import.
To create a new user field in the system in the order card during import, click "Add new field".
Mandatory fields for creating entities in the system when importing orders: "Country", "Order type", "Name".
Data import is performed in the background. When the import is completed, a notification will appear about the status of data uploading, the presence of duplicates and errors that occurred.
Note
When uploading a list of orders with customer data, customers are automatically created with the same data as in the order.