- Working with the "Customer" widget in the chat window
- Working with the "Product" widget in the chat window
- Working with the "Tasks" widget in the chat window
- Working with the "Order" widget in the chat window.
- Working with the "Current cart" widget in the chat window
- Working with the "Visits" widget in the chat window
Working with the "Customer" widget in the chat window
During a dialogue with the customer, you can immediately save the customer in the database, specify contact information and create a new order with pre-filled data.
If a new customer has started a dialogue, the "Save the customer" button will be displayed next to their login. When you hover over the name, phone number and address (fields that are available to edit from the dialogue) fields, a "pencil" icon will appear. When you click on it, a pop-up field opens where you can enter the necessary information.
If the entered data matches that stored in the customer base, a prompt will be displayed allowing you to bind the dialogue to an existing customer.
Note
To save customers automatically, use the corresponding option in the automatic distribution bot] settings.
The chat displays the first customer's phone number from the customer card. If there is more than one number, they are not displayed in the chat.
Filling in, editing and viewing additional customer data
You can quickly fill in, edit and view system and user fields with additional customer information directly from the chat. To do this, click on the search bar below the widget name and enter the name of the field you need. After that it will be displayed for filling in or editing data. Editable and non-editable fields from the customer card will be available for search.
You can also change the display order of the fields, that is, swap them. To do this just drag the selected field to the desired location.
Note
In order for the field to be displayed in the widget always and for other customers, it must be pinned.
The customer's address can be entered in a single "Address" field or splitted into several separate ones.
When splitting, a pop-in window opens with the following fields: Postcode, City, Country, Region, Metro, Street, House, Apartment, Building, Entrance, Floor, Block. However, the “Postcode”, “City”, “Country”, “Region", and “Metro" fields are available even before splitting.
To fill in separate address fields, you should display the desired field in the search (provided that it was not previously pinned).
Important!
If the address is not splitted into separate fields, the information in the "Address" field will not be linked to the information in the "Postcode", "City", "Country", "Region", and "Metro" fields. When editing the contents of these fields the information in the "Address" field will not change.
If the address is splitted into fields, then when you click on one of the fields "Postcode", "City", "Country", "Region" and "Metro", the address editing pop-in window will open with the focus on the field in which you need to make changes.
If the customer decided to change the data in the correspondence, then it can be entered into the card of a pre-existing customer directly from the dialogue. Selecting a portion of the customer's text and right-clicking it will bring up a dialogue box with different options for selection:
- set the first name of the customer;
- set the last name of the customer;
- set the customer's address;
- set the customer's phone number;
- find a product.
If you select one of the first four options, a window will open that will allow you to change the data. If you select the "Find a product" option, a product selection window will open with a highlighted keyword in the search line.
The "Customer" widget also displays customer duplicates, which are identified by phone number and email address. By clicking on the link with a duplicate you can merge customers.
Working with the "Product" widget in the chat window
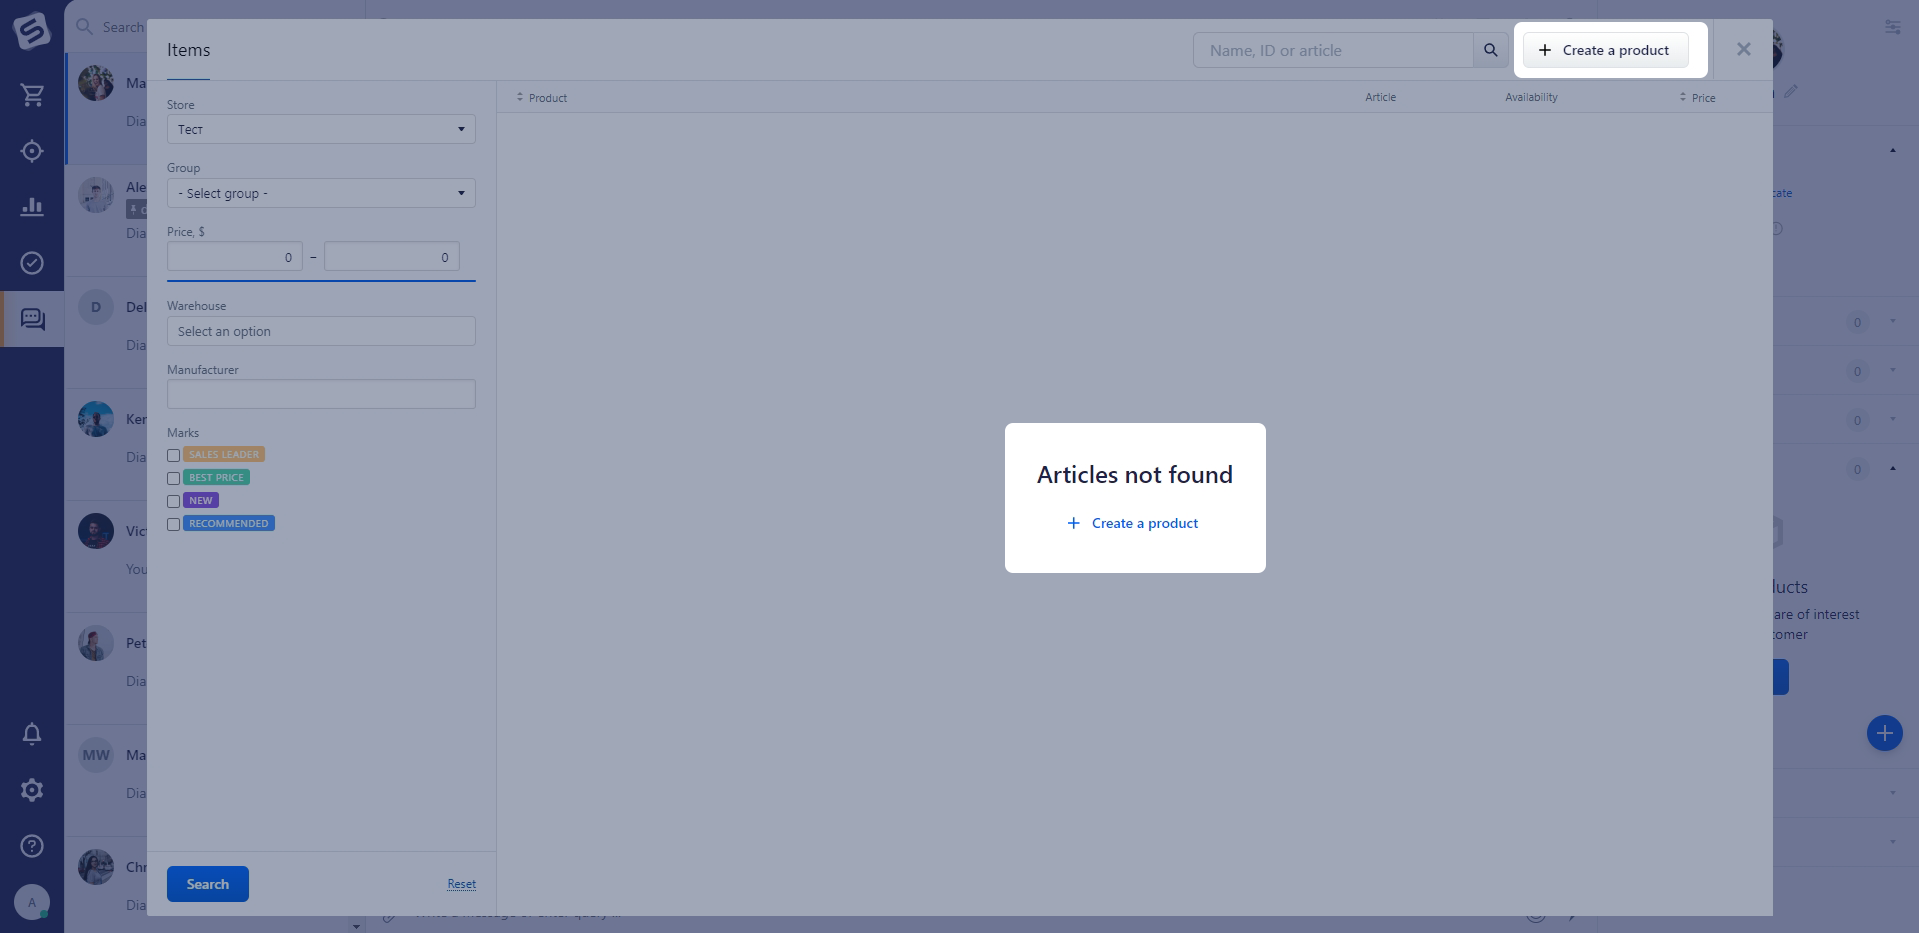
After selecting the "Find Product" option, which was considered at the end of the section above, a PopUp product selection window will open. In the search bar the name of the selected product is filled in automatically. You can edit the value in the search bar, as well as apply filters in the left column and sort by name and price (excluding price type).
Adding a product is also possible by using the "plus" icon. After clicking, the product selection window will open, just like in the order card. The selected products will appear in the area to the right of the message box.
The ability to add products can be useful, for example, in order to track which products the customer was interested in earlier, but did not get to the checkout. You can also send the added products to the customer for approval to get familiarized with them in more detail and then add the necessary ones to the order being formed.
You can also send a product from the PopUp product selection window by clicking on the corresponding button on the right.

It is also possible to immediately create a product from the product selection form. When you click on the "Create Product" button, a new tab will open with the product creation form. After saving, you will need to return to the previous tab to add a new product to the order.
Read more about creating/editing a product through this link.
Working with the "Tasks" widget in the chat window
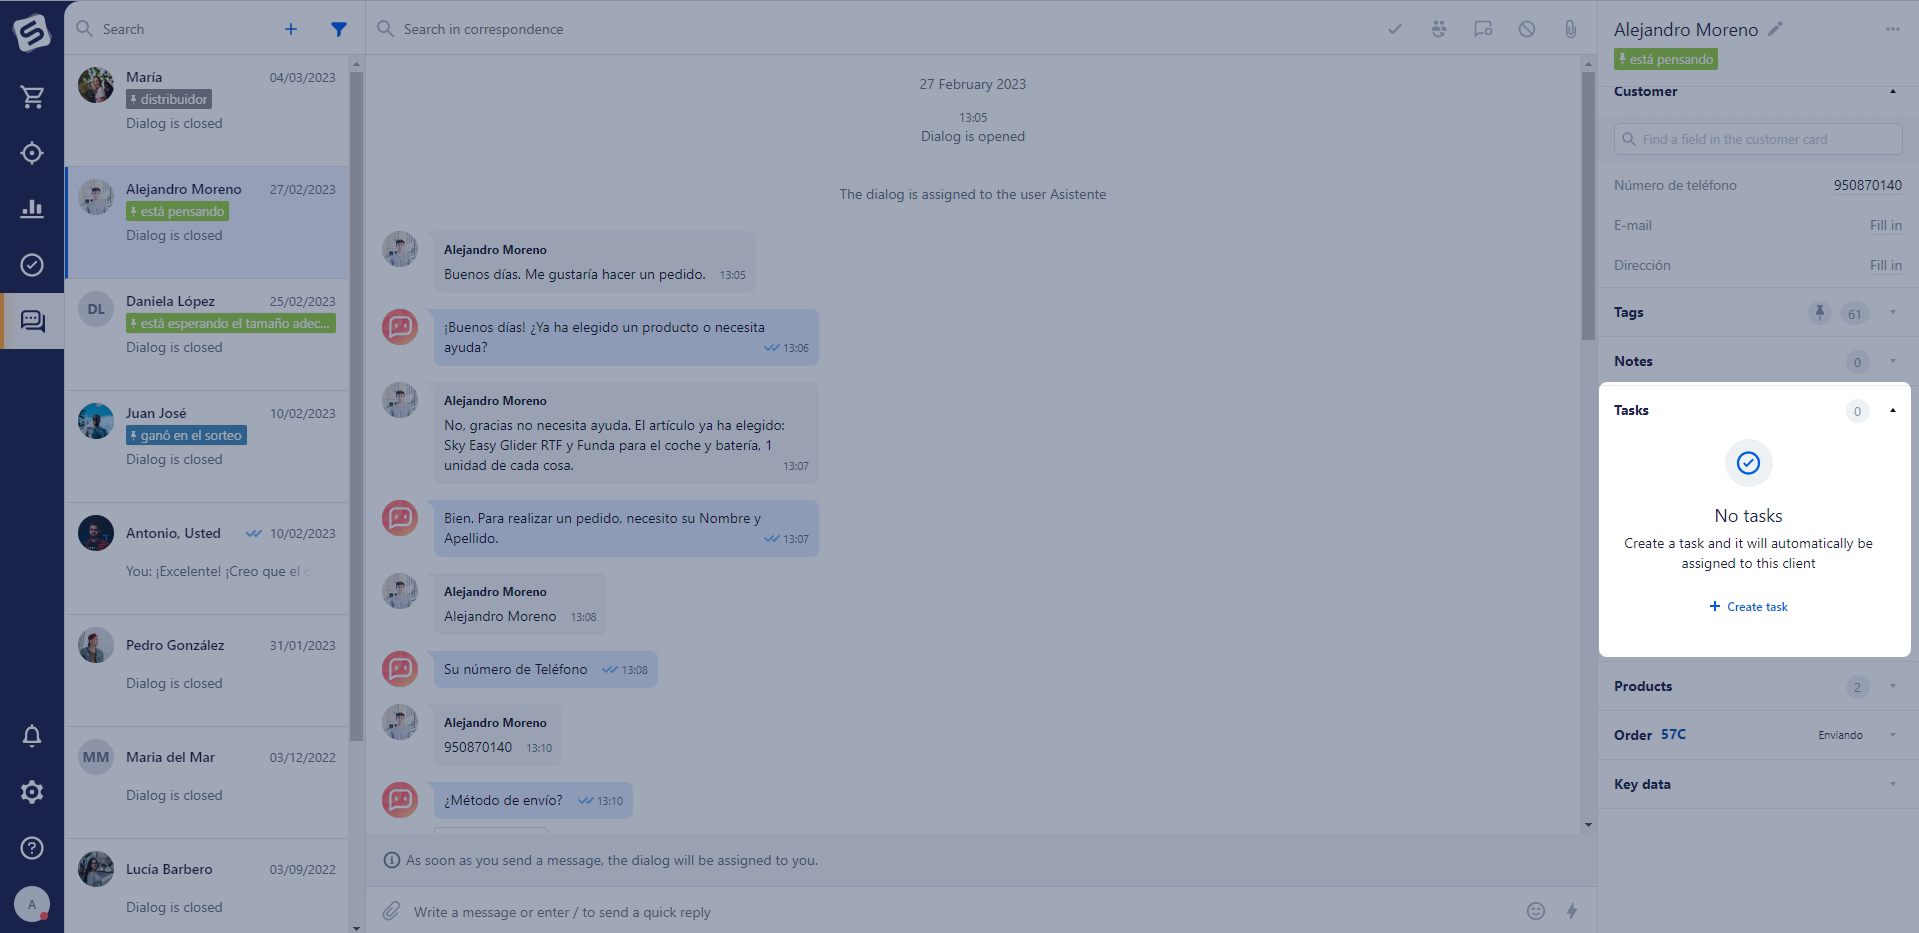
The "Tasks" widget shows you the current tasks related to the customer in the chat, helping you to optimise your work. For example, take a situation where, whilst discussing an order with a customer, you suggest calling them back in an hour about a possible discount for the current order. You can create this as a task directly from the chat window via the "Tasks" widget.
When creating a task, the customer is saved automatically if it has not been saved before.
The pop in window for creating a new task will open. Fill in the standard information on the timing of its execution and the responsible employee. By default, the task will be linked to the customer. If you want to link it to an order, delete the data from the "Customer" field, then the "Order" field will become editable - then enter the order number there. Save the changes. Working with tasks is described in the following article.
The created task will be displayed in the dialog with the customer in the "All" tab or in the "My" tab if the author of the task is also its executor.
To create a task, click on the "+" icon or on the "Create task" button. You will be redirected to the task editing page.
Fill in the required fields and save your changes. For more information about tasks, see the following article.
The created task will be displayed in the dialogue with the customer in the "All" tab, or in the "My" tab, if the author of the task is also the person to which the task is assigned.
The task can be marked as completed by clicking on the checkbox to the left. The completed task is displayed in the task list until the page is refreshed, or when you move to another section.
Access to the "Tasks" widget is activated in the "Chats" settings, in the "Widgets" section.
You can restrict access to tasks in the user group settings. Read more in the related article.
Working with the "Order" widget in the chat window.
In this widget you can create new orders, as well as work with active and completed orders.
To view the list of customer orders, click on the icon ![]() . From the list you can select the order you want to continue working with in the widget. A blue checkmark will appear opposite it.
. From the list you can select the order you want to continue working with in the widget. A blue checkmark will appear opposite it.

You can create a new order from the list by clicking on the corresponding button or directly from the widget.

An order that has not yet been completed, but some of the data has already been filled in, will be saved in the list of orders as a draft. You can create only one draft.

You can pre-select a delivery type. The system also takes into account the dynamic calculation of delivery; information about the cost will be displayed and adjusted in the widget depending on the configured conditions (weight, order amount and region) in delivery before placing the order. When determining the weight and the order amount, the system takes into account the composition of the order. When determining the region, the system looks at the address field in the customer card. In the future it will be possible to change the delivery type only directly from the order card.
Please note that when creating an order from the chat, it is not possible to add identical product varieties. If the identical product varieties appear in a pre-created order, they will be displayed in the chat interface.
After clicking on the "Create order" button, an order is created with the specified data. Click on the "Send to the customer" button to send information about the order to the dialogue.
The "Order" widget defines new orders to be displayed in the dialogue, focusing on the following parameters:
- Matching the store to which the dialogue channel belongs
- Order status from the status group "New"
- Date of order creation
After placing an order, you will see its number, current status and detailed information about the amount to be paid. If necessary, you can change the order status directly in the widget. In this case, the order will be automatically saved, and all installed validations will be checked and possible errors will be shown.
Note
The widget shows orders that are in progress. Orders with a final status (Completed/Canceled) will not be shown in the widget.
When you click on the order number, you will be taken to the order itself. This will help you update information or make changes to the order before sending it to the customer. For example, when changing the payment type or the order details.
The "To be paid" field displays the sum to be paid by the customer for the order.
The payment status is displayed to the left of the sum (partial payment, full payment or no payment).
When you click on the delivery cost, detailed information on the delivery type and cost will be displayed.
Clicking on Payment types will display the types of payment specified in the order. If the payment type with the connected acquiring module is selected, and the order itself has not yet been paid, a button for sending a link to payment will appear. When clicked, a link is generated that is identical to the one displayed in the order card. Paid types are marked in green.

Note
When combining customers, the data in the existing dialogue will also be replaced.
Working with the "Current cart" widget in the chat window
The widget displays information about the customer's abandoned cart. Find more about connecting an abandoned cart in the corresponding article.
This information will help chat managers form an idea of the customer's needs and increase the likelihood of a successful sale.
Available actions with a product from the widget:
- Send it to the customer. The product card will be sent to the customer in the chat.
- Add it to the order. The product will be included in the current order that is being processed. If the customer has no pending orders, a new order will be created.
Working with the "Visits" widget in the chat window
Important!
The widget is available provided that the Online Consultant module is connected.
The widget provides extensive information about the customer, including data on current and previous visits, pages viewed, device used, geolocation and tags. This additional data provides chat managers with targeted information that facilitate more productive communication and ultimately increases the likelihood of the dialog converting into a sale.
Information about the pages viewed
- customer’s current page. The information is updated when the customer navigates to a new page.
- pages viewed by the customer. All viewed pages for the session from which a message was written to the chat are displayed.
Information about the current visit
- start of the visit
- end of the visit
Note
In case the customer is still on the site, the "Currently on site" tag will be displayed instead of the end date and time.
- visit duration. It is defined as the time interval between the end and the beginning of the visit itself.
Information about previous visits
If this is the first visit, information will be displayed indicating that this is the customer's first visit.
In case of a repeat visit, the total number of customer visits will be indicated.
Data about the current device
Information about the customer's operating system, browser, browser language, and geolocation will be displayed.
Geolocation is determined by IP address, the country and city will be specified.
Tags
Transmitted utm tags:
utm_source(Traffic source)utm_medium(Traffic type)utm_campaign(Advertising campaign)