The module is a solution for installation on a website. By installing the JS-code and making the appropriate settings, customers will be able to write from the Live Chat on the website directly to the system.
To connect the module, go to the "Marketplace", click on the module of integration with the Live Chat and click on the "Connect" button.
General settings
In the "Widget title" field, specify the name that the client will see on the site in the title of the Live Chat.
In the "Store in CRM" field, specify the store to which the Live Chat module will be assigned.
The general settings also specify the color of the widget in HEX format (when clicked, a color palette appears), its location on the page, links to social networks and messengers, and whether to hide the widget on mobile devices or not.
reCAPTCHA
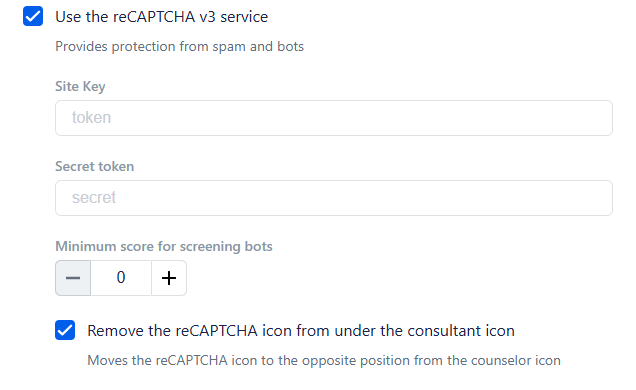
In the general settings, you can enable reCAPTCHA v3 to filter out spam and bots. This functionality works in the background, invisible to users, and does not involve such actions as entering characters from a picture and other similar checks.

To connect, you must register with reCAPTCHA and get the site key and secret token, insert it into the Online Consultant module and save it.
The "Minimum score for filtering out bots" field is used to filter suspicious activity. The reCAPTCHA system analyzes the behavior of visitors and assigns them a rating from 0.1 (probably a bot) to 0.9 (probably, a person).
Select the minimum rating at which the user will be able to write to the chat. If the visitor's rating is below the value you set, he will not be able to send a message.
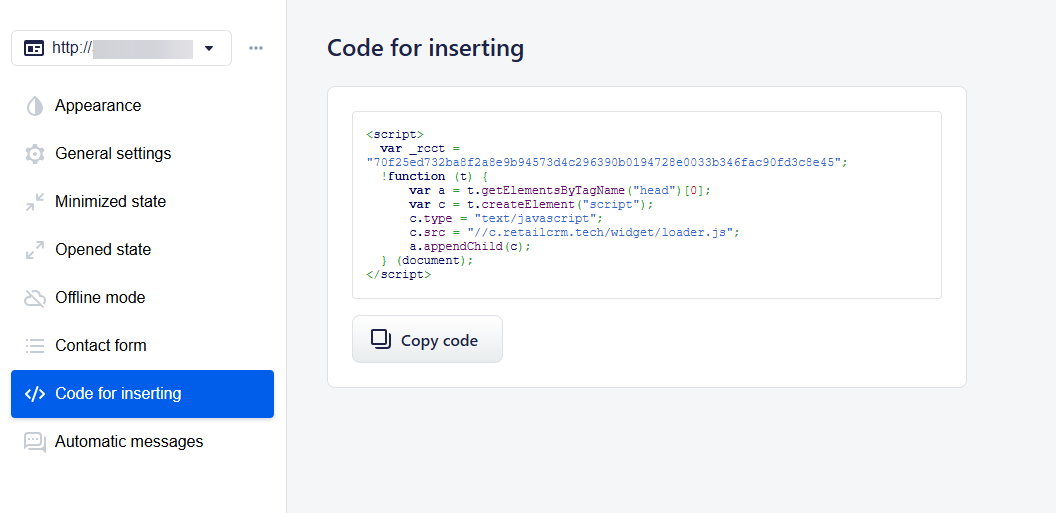
Embed Code
In order to use the widget, paste the JS code provided in the settings on the site pages.

If we declare an object with additional options after <script> tag, before the embed code:
var _rcco = {
      customer: {
            customer_id: 'site-customer-id',
            name: 'site-customer-name'
      }
};
The Live Chat will link the dialog to the client in the system (the client with the specified identifier will be linked in the “Client” widget), and in the dialog, instead of the generated nickname (for example user_123), the transferred user name will be displayed.
Important!
For this function to work, the Live Chat settings must specify the same store to which the site's customers are linked.
As a result, the site should have an entry that looks like this:
<script>
 var _rcco = {
     customer: {
           customer_id: 'site-customer-id',
           name: 'site-customer-name'
     }
 };
 var _rcct ="8881115a37e85875bd0c8c01234c2857cbfac4e47cb94777399f12d681000f6a";
 !function(t){
     var a = t.getElementsByTagName("head")[0];
     var c = t.createElement("script");
     c.type="text/javascript";
     c.src="//c.retailcrm.tech/widget/loader.js";
     a.appendChild(c);
 }(document);
</script>